 Skip to content
Measure each room at its longest and widest points, right at floor level, and write the numbers down twice before you trust them. Split any L-shaped or irregular room into simple rectangles, add those areas together, then apply a waste factor of 5–15% depending on the layout and round up to the nearest full box. Measure doorways, closets, and stairs on their own, and always keep one spare box in reserve for repairs down the road.
TL;DR:
- Accurate measurements should be taken at the longest and widest points, with three attempts if measurements do not match closely.
- Larger spaces benefit from laser tools for precision, especially over 200 square feet, but reflectivity and dark surfaces can affect accuracy.
- Adding 10-15% waste to the total area is recommended for complex layouts, patterns, or irregular shapes to prevent shortages and reduce extra costs.
- Measure doorways at the centerline, count each stair tread separately, and treat tricky areas like bay windows as custom shapes for better estimation precision.
- Professional measurement is advisable for projects exceeding 2,000 square feet or with complex layouts to ensure accuracy needed for warranty and installation.
Table of Contents
- How Do You Measure a Floor for an Accurate Quote?
- Which Measuring Tool Actually Gives You the Best Numbers?
- How Much Extra Flooring Should You Order for Waste?
- What About Stairs, Doorways, and Other Tricky Spots?
- From Measurements to Boxes: A Worked Example
- When Should You Call in a Professional Measure?
- What We See Homeowners Get Wrong Most Often
- Get a Free Phone or Photo Quote From J.R. Hardwood
- A Few Tools Worth Bookmarking
- Sources
How Do You Measure a Floor for an Accurate Quote?
Getting a number you can hand to a contractor without a follow-up call takes a little more than a tape measure and a guess. Here’s the workflow we walk homeowners through before they ever pick up the phone for a quote.
- Sketch the room first. Grab a notepad and draw a rough outline of every space getting new flooring, labeling each rectangular section as you go. This sounds basic, but it’s the step that prevents missed corners and under-ordered material later.
- Measure length and width at the longest and widest points, at floor level, not at the baseboard or trim.
- Measure twice, record once. Write each number down to the nearest half inch. If your second measurement doesn’t match your first, take a third.
- Break up irregular shapes. For L-shaped rooms, bay windows, or anything with a jog in the wall, divide the space into rectangles, calculate each one, and add them together for the total.
- Handle closets and alcoves separately if flooring won’t extend under appliances or built-ins. Those footprints either get added in or subtracted out, depending on the job.
- Note doorway centerlines. Measure to the middle of each doorway opening. That number matters for transition strips later.
A few habits separate a usable sketch from a guessing game:
- Keep your sketch and measurements together in one place, not scattered across sticky notes.
- Label every room clearly, especially if you’re sending the sketch to someone else.
- Photograph tricky corners while you’re standing right there. You won’t remember the details a week later.
This is the same core method Calcipedia’s flooring calculator methodology recommends: measure the extremes, break complex shapes into rectangles, add the areas, then move on to waste and box math.
Which Measuring Tool Actually Gives You the Best Numbers?
The right tool depends on the room, not just what’s sitting in your junk drawer.
- Tape measure: cheap, reliable, and perfectly accurate for short runs. Just keep it flat and taut. A sagging tape adds inches you don’t want in your quote.
- Laser distance tool: this is where accuracy jumps for larger spaces. Rooms bigger than roughly 200 square feet measure faster and more precisely with a laser than a tape, according to FlooringCostPro’s tool comparison. Watch for reflective surfaces and very dark walls, both of which can throw off the reading.
- Measuring apps: handy for sketching layouts and auto-calculating area, and useful if you’re sending photos for a remote quote. Some require a subscription, so check that before you build your whole workflow around one.
Pro Tip: Snap a photo of your carton labels and any oddly shaped corners before you toss the packaging. Installers and remote quote teams both work faster when they can see exactly what you’re working with.
How Much Extra Flooring Should You Order for Waste?
Nobody wants to order twice, and nobody wants a floor that’s missing three planks on installation day. The fix is building a waste cushion into your total before you ever call a supplier.
Waste guidance by layout, according to the Flooring Institute’s waste factor calculator:
- Straight-lay planks or standard tile: 5–10% extra
- L-shaped rooms or multi-room projects: around 10%
- Diagonal, herringbone, or chevron patterns: 10–15%
- Complex layouts with many corners or angles: 15–20%
Tile and patterned carpet often land on the higher end of that range too, sometimes 10–15% or more, simply because pattern matching eats material.
The math that actually saves you money: add up the total area across every room first, then apply the waste percentage to that grand total rather than room by room. The Prime Calculator’s guide on calculating flooring area points out this single change reduces leftover material and cuts your risk of a dye-lot mismatch on a future repair.
Once you have your padded total, divide by the coverage per carton listed on the box and round up to the nearest whole box. A little extra material sitting in the closet costs far less than a second delivery fee or discovering your dye lot was discontinued.
What About Stairs, Doorways, and Other Tricky Spots?
These are the areas that trip up even careful measurers, so treat each one as its own mini-project.
- Doorways: measure to the centerline of the opening, not to the edge of the trim. Transition strips get ordered based on that centerline number.
- Stairs: count every tread individually, then measure tread width and depth. Multiply by the number of steps rather than eyeballing a total run length. Plan for one stair-nose piece per step if you’re installing LVP or hardwood, since stairs often drive more cost per square foot than any other part of the job.
- Islands and built-ins: only subtract their footprint if flooring stops at the edge. If it runs underneath, include the full area.
- Bay windows and curves: break the space into triangles or trapezoids, or use a flexible tape and round up. Curved spaces are one place where a slightly generous estimate beats a precise one that comes up short.
From Measurements to Boxes: A Worked Example
Once your sketch and numbers are solid, the math is straightforward: add up room areas, apply your waste percentage, divide by box coverage, and round up to whole cartons.
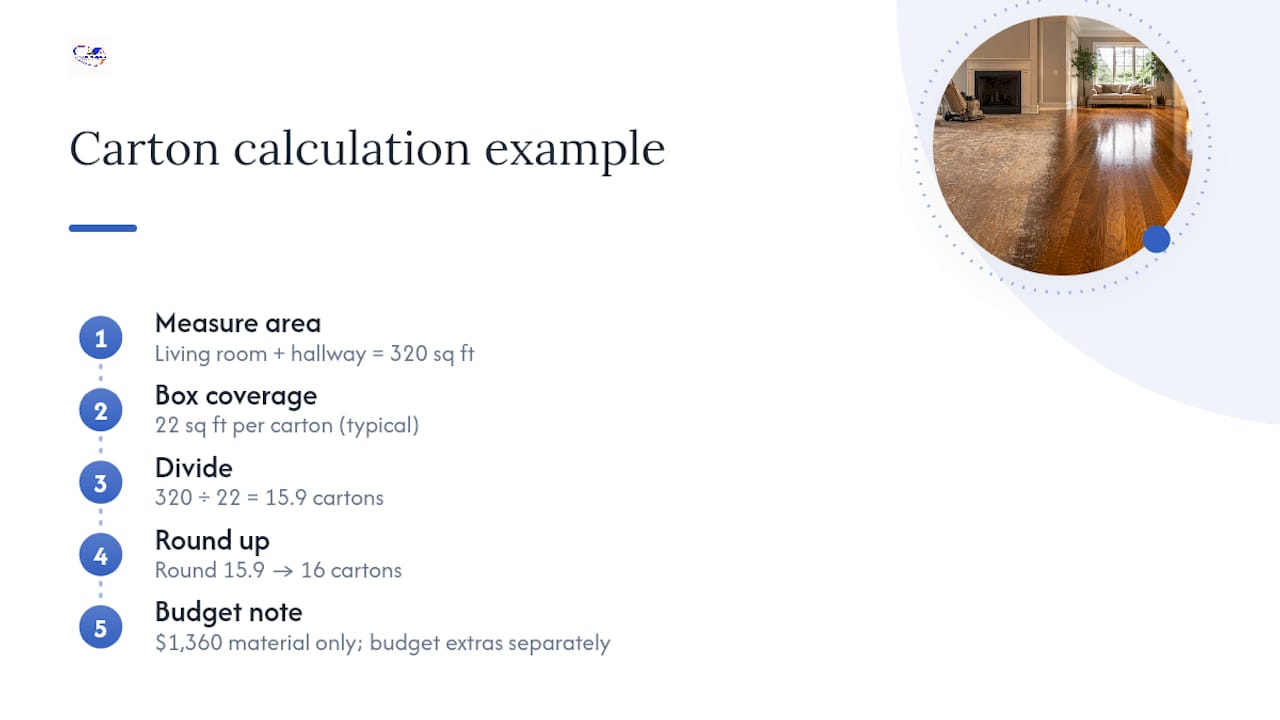
Say your living room and hallway total 320 square feet combined. Hardwood typically covers 20–25 square feet per carton, so at 22 square feet per box, that’s 16 boxes, rounded up from 15.9, according to Calcipedia’s packaging notes.
That $1,360 is material only. Budget separately for underlayment, adhesive or thinset, transition pieces, stair noses, and disposal of the old flooring. When a contractor’s quote comes in higher than your material math, ask exactly what’s bundled into their labor line, since that gap is almost always installation, prep, and disposal rather than a padded material count.
When Should You Call in a Professional Measure?
Some projects are worth handing off, especially once the math gets complicated.
- Jobs over 2,000 square feet, where a small measuring error compounds fast.
- Stair-heavy projects with multiple flights or landings.
- Layouts with several irregular rooms, bay windows, or angled walls.
- Any job where your installer or warranty requires a professional measurement on file.
A professional measure typically produces a laser-accurate plan, seam diagrams, and a firm box count that installers rely on for warranty coverage and scheduling. Retailers sometimes charge $50–$150 for this service, and many will credit that fee back if you purchase materials through them, so it’s worth asking before you book.
What We See Homeowners Get Wrong Most Often
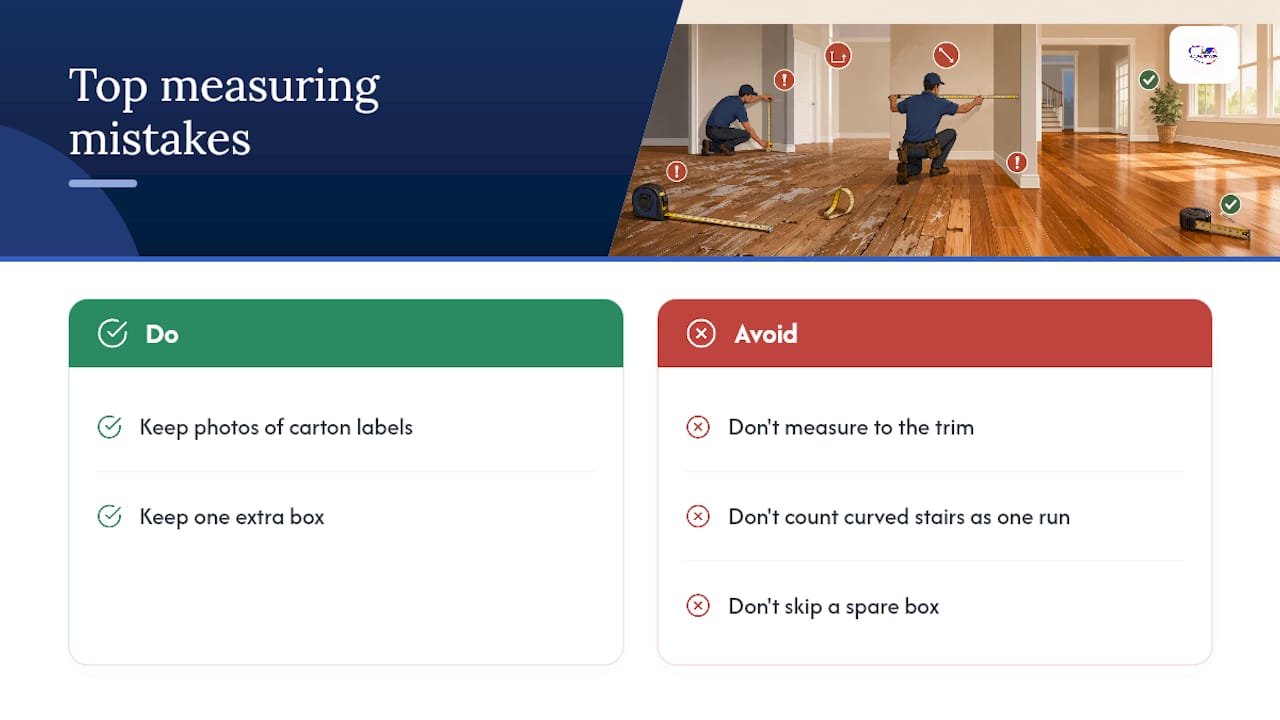
We fix the same three measuring mistakes constantly. First, people measure to the trim instead of the doorway centerline, which throws off transition strip orders. Second, they treat a curved staircase as one long run instead of counting each tread individually. Third, they skip the spare box and end up hunting for a matching dye lot months later.
Keep photos of your carton labels. Keep one extra box. Those two habits solve more repair headaches than anything else we’ve seen.
— J.R.
Get a Free Phone or Photo Quote From J.R. Hardwood
If your measurements feel solid but you’d still rather have a professional set of eyes on the job, that’s exactly what J.R. Hardwood Floor Refinishing & Cleaning built our quote process for. Instead of scheduling an in-home visit just to get a ballpark number, we offer free over-the-phone quotes based on your sketch, photos, and a few key measurements, no site visit required to get started. It’s the faster route for Denver Metro homeowners who want real numbers without blocking off an afternoon for an estimator.

Before you call, gather three things: your room sketch with labeled dimensions, photos of any irregular corners or transitions, and rough measurements of stairs if they’re part of the project. From there, our team can walk through your phone flooring quote process and tell you what to expect on cost and timeline. If you’re weighing a full refinish instead of new material, our guide on hardwood floor refinishing versus a DIY approach is worth a look too. Either way, send us your photos and sketch, and we’ll get you real numbers, not a guess.
A Few Tools Worth Bookmarking
Save your calculator outputs and carton labels alongside your sketch so you can double-check everything later. Calcipedia’s flooring calculator and the Flooring Institute’s waste factor tool are both solid for verifying your own math, and a blue tape walkthrough checklist helps confirm nothing gets missed before installation day.